
With the pent-up demand for travel, you’ve likely been thinking about, already planned, or completed some trips this summer. If you’re still planning to hit the road in the near future, it’s a good time to make sure your car is just as ready as you are to get away!
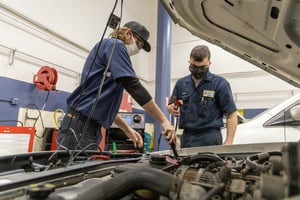
Students in Joliet Junior College’s Automotive Technology program spend more than 500 hours learning about and repairing actual customer vehicles using modern equipment and technology inside our state-of-the-art facility. Our professors help them become more detail-oriented, and grow their organizational, problem solving, and customer service skills.
Below, our automotive experts offer you this detail-oriented checklist to prepare you for your next road trip.
1. Oil

Self-check and top off:
- Remove the oil dipstick and wipe it off completely.
- Once clean, reinsert the stick and remove it again.
- Hold the handle up, away from the ground.
- Check the levels at the bottom of the stick.
- Oil should be visible between the ‘full’ and ‘low’ marks
- If low, top off with the manufacturer’s recommended oil viscosity as listed in the owner’s manual.
- Lack of oil can cause engine damage. Having to add more than half a quart would warrant taking vehicle in for further inspection.
Mechanic’s note: Due for an oil change? Don’t wait until after your trip. Change it before you venture out so your car is ready for optimal performance on the highways. An appointment could also show other items requiring attention and be fixed prior to your trip, so your vacation isn’t spent at an auto shop.
2. Coolant
Self-check and top off:
- Look through the coolant reservoir to gauge level.
- Should be between the ‘full cold’ and ‘full hot’ marks on the tank.
- If coolant is low you can top off following the manufacturer’s recommend type of coolant (there are many different formulas).
- If there is no coolant in the reservoir, schedule your vehicle to be inspected soon. Driving with no coolant in the engine can cause damage quickly.
Mechanic’s note: Do not remove your coolant cap while the engine/radiator hoses are hot to the touch (the cooling system can become pressurized after driving and can cause burns if opened while hot).
3. Tire Pressure

Self-check and inflate:
- Use a tire pressure gauge and check all tires, including your spare.
- All tires should be inflated to the manufacturer’s recommendations (Found on sticker on inside of driver’s doorjamb or in owner’s manual).
- Under or over inflated tires can pose a safety risk and reduce miles per gallon during your trip.
- Don’t forget your spare and know how to replace a flat tire, if needed.
Mechanic’s note: Properly inflated tires also avoid that pesky TPMS light on the dash!
4,. Washer Fluid and Wipers
Self-check and top off/replace:
- Under the hood, look for the cap with the windshield logo.
- Make sure fluid is a half an inch from the top of filler neck.
- Once full, check wiper operation and effectiveness by cleaning windshield.
- Streaks or missed areas warrant a wiper replacement.
Mechanic’s note: It’s much easier to remove dead bugs and road grime with new wipers than old!
5. Brake Fluid
Self-check:
- The brake fluid reservoir is a clear reservoir located on the driver side firewall under the hood, (think about where your brake pedal is on the inside).
- Locate the minimum and maximum markers on the side of the reservoir and confirm your fluid level is in between those two lines.
Mechanic’s note: Do not top off brake fluid. Low brake fluid indicates your brake linings (pads or shoes) are wore out or you have a leak, both of which warrant an inspection as soon as possible.
6. Air Filters
Self-check and replace:
- Following the manufacturer’s guidelines, remove the engine air filter.
- Using a flashlight, shine a light through the backside of the filter.
- If you can detect light shining through the opposite side, your filter is still in good condition. If no light shining through, or the light is dim, your filter is likely becoming clogged.
- Following the manufacturer’s guidelines, remove the cabin air filter and inspect using the same method as the engine air filter.
- Most vehicle cabin filters are located behind the glove compartment.
Mechanic’s note: A clogged engine air filter can cause low miles per gallon. A dirty cabin filter can cause poor air flow through your vents and poor air quality to breath.
7. Lights
Self-check and replace:
- Inspect all of your exterior lightbulbs.
- Working with someone else, inspect the operation of all of the exterior lights in the front and rear of the vehicle.
Mechanic’s note: Properly working lights not only offer visibility at night but can help prevent you from receiving a ticket.
Inspection
For a more comprehensive vehicle inspection, JJC students and employees can have their vehicles serviced at JJC’s Automotive Service Shop. They provide a detailed and complete inspection and a glimpse into the health of your vehicle.
The shop is open during the fall and spring semesters, during which students receive hands-on experience. Automotive faculty also occasionally offer car care events for community members to have their vehicle’s serviced. To schedule an appointment, call 815-280-2229.
Related Posts
5 In-Demand Careers You Can Train For
6 Safety Tips for Winter Driving
Want to work in automotive service? Classes begin Aug. 23.