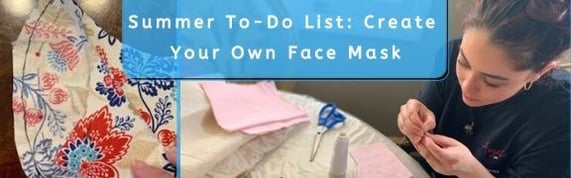
Sure, the stores are now stocked with a variety of face masks that help protect us amid the COVID-19 pandemic. That doesn’t mean you can’t still create your own, especially if you’re looking to fill any free time this summer with some new projects.
Need a blueprint to follow? Students in JJC’s costume class, under the direction of Fine Arts Professor Julie Giampaolo, not only sewed their own masks from home this spring as part of remote course work, but donated them to community members! Over 500 masks were distributed to eight different medical facilities, as well as to JJC employees and students.
Whether you’re sewing by hand or using a machine, you can create your own mask with some fabric, thread, and by following these steps.
Step #1
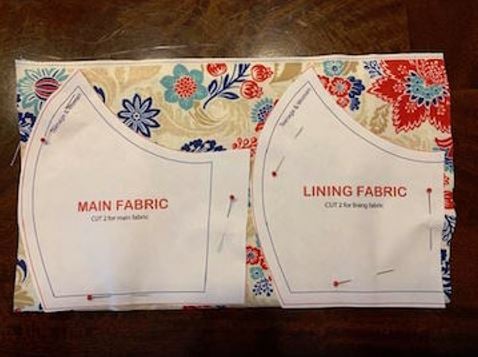
Choose a size pattern that suits you. The fine arts team selected from options available through the website CraftPassion.
Step #2
Fold the fabric in half with the wrong sides facing each other. Pin the pattern pieces on right next to each other, with the long straight side pinned to the fold. Cut out your pieces, cutting through all the layers.
Step #3
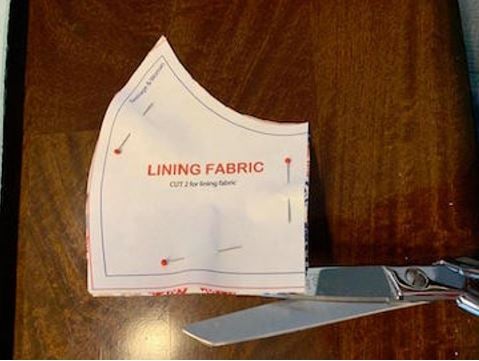
Cut each of your two pieces apart at the fold to make four total pieces of fabric.
Step #4
If desired, mark your seam allowances on the wrong side of the fabric.
Step #5
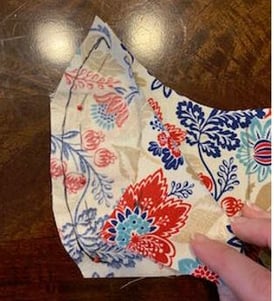
Pin the MAIN fabric pieces together - right side facing in – and sew them together along the long curved edge using a back stitch (or sewing machine).
Step #6
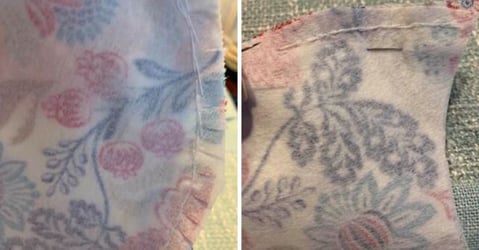
Clip the seam allowance along the curve. Be careful not to clip any of your stitches. Repeat this sewing and clipping on the LINING pieces.
Step #7
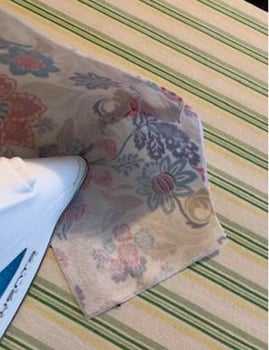
Using your iron, press the seam allowances into the top and bottom, with the seam allowance on the wrong side of the fabric. Press the center seam flat.
Step #8
Pin the MAIN and LINING pieces – wrong sides together – by aligning them first at the center seam and pinning the top and bottom of that seam. Then pin the top and bottom together. Your seam allowance should now be hidden inside the mask.
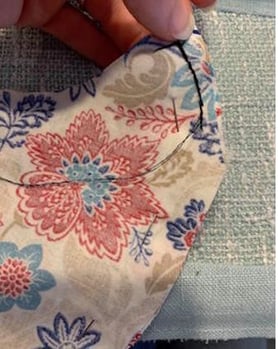
If you’re machine sewing, you can just start on one end of the top and stitch the mask all the way along the top, then repeat for the bottom. If you’re hand stitching, you might find it easier to stitch in four sections: 1) Begin at the top center seam and stitch one side. 2) Go back to the top center seam and stitch the other side. 3) Repeat for the bottom. 4) Leave the sides open.
Helpful note: JJC fine arts students hand-stitched masks with all seam allowances on the inside, rather than hiding the seam allowances between the two layers of the mask. If you’re hand sewing and having a hard time keeping the seam allowances hidden between the two layers, you can fold everything in and stitch it like this:
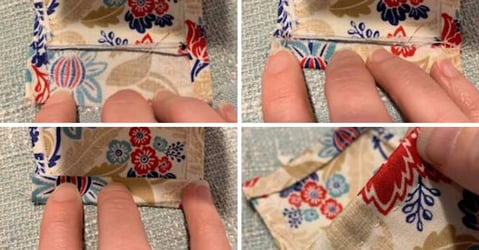
Step #9
Fold the sides in about one-quarter inch, then fold over another quarter inch and pin in place. Sew along the long edge to make your elastic pocket.
Helpful note: Reinforce the top and bottom stitches of the pocket – that’s where the elastic will pull the most.
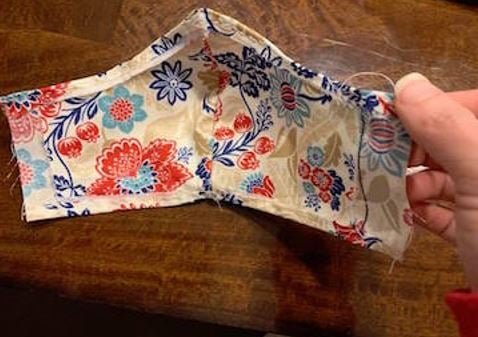
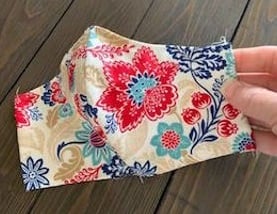
Step #10
Your finished mask will look like this:
Step #11
To add elastic: Pin a small safety pin to one end of an elastic piece – between 6-8 inches long – and thread it through one side. Tie a knot in your elastic, then pull it until the knot is hidden inside the pocket.
Step #12
To add fabric ties: Sew an 18-inch tie to each of the four corners of your mask.
Helpful note: You may find that this style works better when tied behind the head rather than around the ears.
Questions About the Process?
Professor Giampaolo is happy to assist! Feel free to contact her at jgiampao@jjc.edu.
A Major Impact
JJC fine arts students used these methods to create and donate more than 500 face masks to multiple businesses and organizations in the community. That includes the Spanish Community Center, where a JJC graduate who works there reached out to the college after seeing their story on Telemundo Chicago. Another fine arts student also created 63 ear savers on his 3D printer.
A special thanks to JJC Fine Arts Department Chair Lori Schahrer and her mother, who have donated supplies and made their own masks; Executive Director of Institutional Advancement and the JJC Foundation Kristi Mulvey for donating fabric; and Dean of Nursing, Health and Public Services Dr. Amy Gray, who helped identify medical facilities the class could donate masks to.
Related Posts:
JJC's Fall 2020 Semester: Your Guide to Registration, Operations
7 Fun Non-Credit Virtual Classes You Can Take This Summer
5 Things You Can Do to Adjust to Online Learning
How JJC Students Can Seamlessly Transfer to a Four-Year School
***
Interested in fine arts courses at JJC? Check out: